So everytime I washed the B, or even looked at it, I couldn't help but notice the lower front valance and how sad it looked. It was painted the same color blue as the main body but it had faded to a light, dull blue. I figured this was another oppertunity for a cheap, easy, quick fix with big payoff. Well it was cheap and I think it paid off but it certainly wasn't easy or quick. Getting the valance off was the hardest part. It was designed to only come off after you remove the bumper. Well that wasn't a project I was ready to get into and I figured there's always a loop hole. The valance was held to the body with 8 rusted screws. There's actually a bolt welded to the body for the screw to turn into. Seems easy enough: just unscrew the screws. Not so much. The screw heads are only accessible through a 3 inch gap in between the bumper and the body. Hence, take off the bumper for free access to the valance screws. So first I tried a small palm size screw drive which barely fit down and into the screw. But the screws were so rusted together that using a screw driver with such little torque just stripped the screws. I just couldn't get a good grip on them. So I used my vise grips, hammer, and a flat head screw driver to loosen it up. Some would just not budge and I had to pound off the head of the screw. It took me all together about 4 hours to get it off. Once I did, it was pretty smooth from there on. I also removed the grill grate between the radiator and bumper and refinished it.
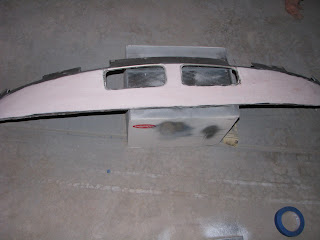
Here's a before shot. Not that great.
Here's a before shot. Not that great.

Step 1: Remove Valance/Strip Paint
After I finally got the valance off I noticed there was alot of paint chipping. Just painting over it would leave a bunch of divits from the uneven paint. So I used some paint stripping gel that I painted on there. It took several applications because I noticed after the blue was stripped, there were several other layers of paint, primer, and bondo. It was like peeling an onion. I used a spackle scraper. I had to just take it down to the bare metal so everything would be even. The stripping gel is potent and will burn your skin. Wear gloves.

 After it was stripped to the bare metal I pounded out a few small dings. There were still some unrepairable divets and dents so I decided to try my hand at bondo. Not as easy as it looks on American Hotrod!
 I only applied the bondo to main part of the valance. The top pieces actually slide in between a narrow slit between the bumper and body.
  After the bondo cured for about 30 mins, I used a variety of sand paper to smooth it out, starting with 40 grit and working my way down. Lots of dust, wear a mask.
 After I had it smoothed out nice I hit it with two good coats of primer and let it dry overnight.
 After I primed it, I hit it with two coats of flat black the two coats of gloss. I didn't use a gloss black because it doesn't apply as evenly as a flat black. Or at least that's what I've learned from building model airplanes. I find it looks better using a flat color then following through with the gloss. It also protects it longer. There are still some small divets that I couldn't see until the black was applied. So my bondo job was not as perfect as I thought after I finished sanding. I probably could've used another application of the bondo. Oh well. I plan to replace this piece with an air dam.
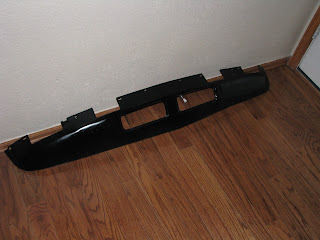
 I let the black paint and gloss set overnight. I replaces all the rusted screws with hex head bolt and washers. This way, come time to take it off and put on the air dam, I can easliy slide in a socket wrench or an open end to get them off. Here's some "after" pics. I'm pretty happy with it. I really wanted the valance to match the bumper; to give the impression of a large front end. I think it worked.


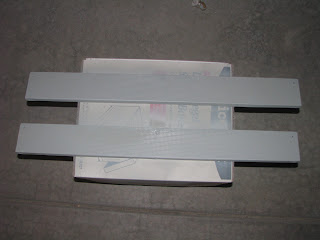
Since I had to remove the grill grate to get to the valance and I had the paint out, I figured I'd hit with some primer and sliver metallic left over from the wheel project. It makes it pop out just a bit more behind the bumper and it was super easy. I also replaced the mouniting screws.


 After a good scrubbing, I hit them with a primer coat using the left over primer from the wheel project. See that post for the details.


 I cut some left over carpet (from the trunk project) and tucked it under the dash to conceal all the wiring. There is a plastic bottom dash piece you can buy from VB. I think it runs around $80. This picture isn't that good. I used velcro to secure it under the dash. This way I can still easily get to my wiring.
 I replaced the orginal shifter with a slightly shorter, chrome shifter. Then I removed the old leather boot and just kept the rubber boot in place. I think it looks a bit sportier. I also polished up the chrome housing ring.

 I wrapped the leather in plastic to protect from overspray the I hit with a coat of primer.
 Next, I followed with a coat of black. I learned from the rim project that the silver paint tends to peel if you try to mask it, even after letting it dry 48 hours. So I did black first, then taped off the sections I wanted to remain black.
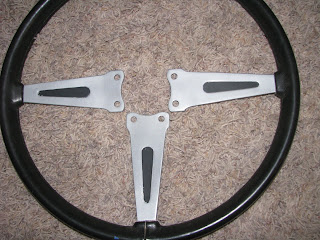
 Then I hit it with another primer coat and followed with the silver. Then I pulled the tape off and here's the final product. Also, here's a picture of the old wheel next to the newer finished wheel. I also painted the logo on the rubber horn cover to match the car.


